Posts

Showing posts with the label Artisans

Transferring a Pattern

Image
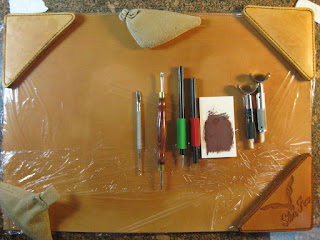
Some years ago, because my leather dried too quickly, I needed to figure out an option to maintain a working moisture content in the leather for longer. If leather is wet and allowed to dry too often it becomes harder, literally tougher to cut and tool. Because of this I decided to try covering the leather with plastic to retain the moisture. After trying several kinds of plastic, I settled on cling wrap, any brand. Because it is so thin and strong I can case the leather, cover it with the plastic and when it's ready for transferring a design, put the paper pattern right on top and trace away. My pattern doesn't fall apart because of the moisture and the lines remain crisp and clean. I can feel an indentation on the paper with my finger where the tracing is already done or lift and look if necessary. Tracing film works well but because of the thickness the lines transferred tend to be wide and blur when put close together. Another little time saver is to use a modeler right ove

Designing patterns

Image
Patterns can be easily designed from photo's you've taken then using a copy machine to size and piece each design element. Using a black, fine point marker, trace each piece for your design carefully eliminating any part of the photo you don't want. Set the copier to a lighter setting to get rid of distractions in the pattern. Your black traced lines will show up clearly. Use the marks you are familiar with on a leather pattern ie. solid lines for cutting, dashed lines for details not cut, and feel free to add contours like muscle structure and I'll show you how to make your modeling a bit easier. Make copies of the sizes you want these design elements to be when they are assembled. Piece your picture together as you like and tape the parts down. Copy the work one more time as one piece and voila, you have an excellent pattern! I can draw, but this kind of an assembly makes designing a custom pattern a bit easier for people who don't draw well. (Make s

Embossing leather with plugs

Image
There are many ways to emboss (raising from behind) leather images. Because I use a cut and lift style on the surface for most works on paintings, the plugs used are made from 1.5 to 2 oz. leather stacked and shaped for the desired effect under 6 oz. leather for the primary working surface. This way a plug can be lifted with the top surface when it's cut for extra strength and stability especially on thin parts like the antlers on this deer. Note that during the transfer process I also started some of the modeling. Only the head and right side antler (from your view) will be embossed on this picture. After cutting the work and doing the basic beveling of the subject, in this case the head and antlers, make a tracing, or faster and more efficient a photocopy of the leather surface to use in making the plugs. This is the actual photocopy of the leather When a plug pattern is made from the original tracing pattern you might not be compensating for a cut made heavier or thinner t

The Versatility of Leather

Image
The first projects I and many other leather workers learned on were 3 discs of leather, 3.25" in diameter, found in the Beginning Kit with some tools from Tandy Leather Company. I've kept those first works of mine as a constant reminder of where I came from all those years ago. As artisans learn we often moved in different directions to fullfill desires for achievement, ribbons in competition or needs in a market that would provide a living. I worked a full time job in graphic arts and marketing and, like many leather artisans did leather work as a hobby. Over the years, decades actually because we are not discussing 5 year periods here, I learned how to make a great many different kinds of things with leather; wallets, belts, key cases, photo albums using kits but, as knowledge grew so did the styles and types of products made; holsters, knife sheaths, custom works of all kinds and patterns, designs and publishing. No matter how many awards were won and how many shows I j

Secrets of Excellence

Image
The secrets of excellence in leather carving start simply enough with preparation of the leather. Years ago, maybe even YEARS ago I learned by reinventing the wheel. That means when someone said "case leather" they didn't say how much, with what, how long, they said wet the leather. So in the bathtub it went and soaked, I read about that somewhere, then out it came, dripped a bit and on the table it went for a while. What is a while? Then I learned it should feel cool to the touch and the surface should return almost to the color it started. That's closer to the truth, but then I'd carve and tool the traditional western design and I was DARN SLOW, the cutting was done and half the pear shading and the leather was drying too much. So, I'd wet it with a sponge (the whole thing) and wait for the right coolness and color then race to get to the beveling (the term "race" is relative when you are slow) but by then the leather was too dry again. There wa